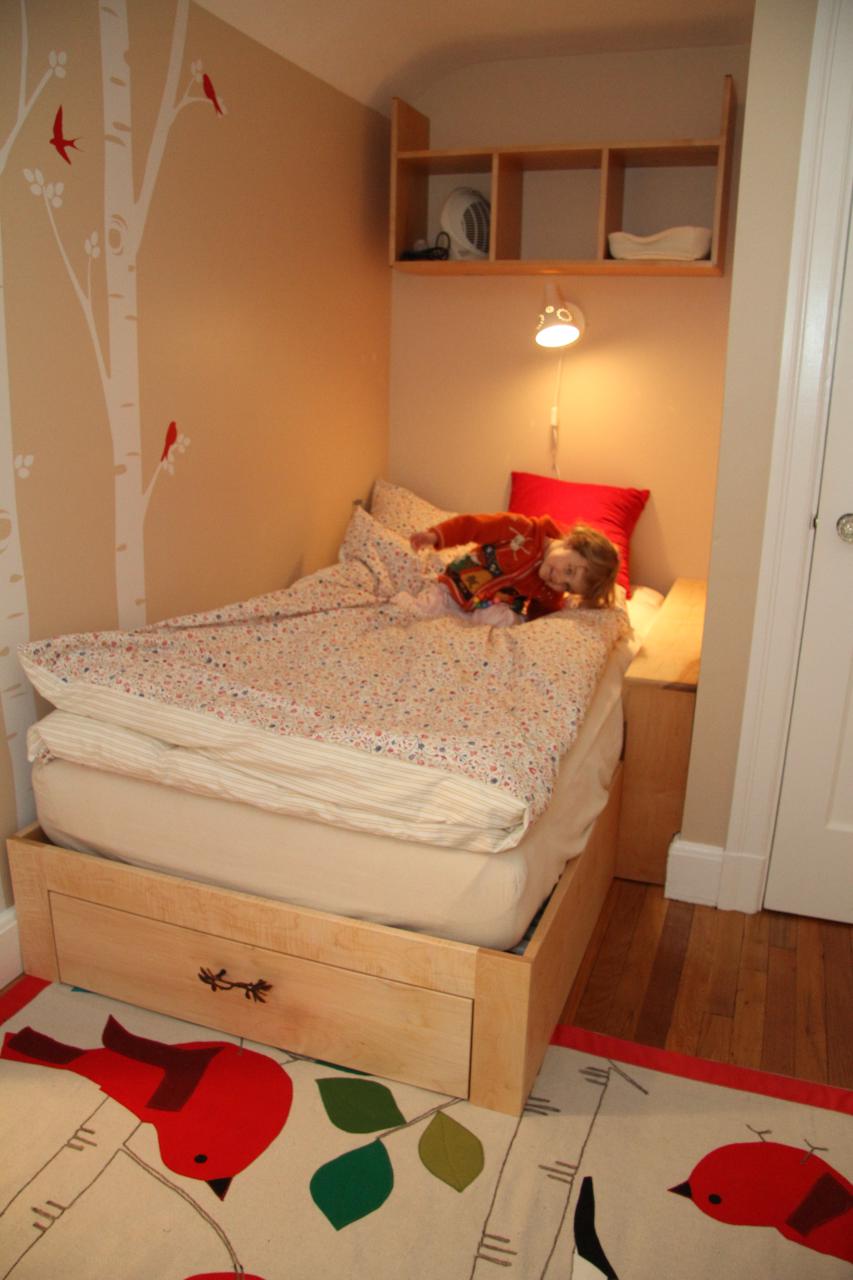
Last spring, we redid the baby's room. Sniff - it was time to let go of the nursery and come to terms with the reality that we now have 3 'big girls'. "I told you I is a big girl!" is what the babee has to say on the matter...
Anyway, the room is microscopical. Smaller than some people's walk-in closet. Speaking of which, we removed the claustrophobically small closet from the room, to create a bit more open space.
Anyway, back to the subject of this post: The rug. I'm particular about wanting natural materials, and in combination with the particular size I wanted and the styles I had in mind, the pickings were slim. So I decided on a completely untested DIY project based on the assumption that if that Stewart woman can paint a rug on canvas, I can sew one on the same material.
At home depot, I lucked into a natural color heavy duty cotton drop cloth on clearance. Seriously serendipidous. And no, I didn't iron it before commencing work. Stop acting surprised, now.
The birds were made of 100% wool felt which so far (9 months of very occasional, gentle vacuuming) has held up nicely. I enlarged the red bird from a graphic I found on the web, the woodpeckers and the tufted titmouse were enlarged from actual bird photographs.
I worked on the layout after cutting one layer of canvas to size (5'x6' I believe) and stitching the wings/tails onto the birds (using a plain zigzag stitch, and some straight stitch for the detail on the woodpeckers). The blue painters tape was used to create the outlines that I later made by stitching thick brown/gray wool yarn from the Drumlin Farm sheep down using a black heavy duty thread and again, a plain zigzag stitch.
I stitched the wool yarn down, and applique'ed the birds and leaves, onto a single layer of canvas. It turned out to be extremely important to strategically work from the center outward, or else the arm on my sewing machine wouldn't have fit the rolled up rest of the rug (same problem as with machine quilting). After that was all done, except the birds' feet, I cut a second layer of canvas, to extend 2in outside the original layer. I pinned it under the first layer, and then stitched down the birds' feet using red or gray/brown wool yarn. That kept the layers together just enough. For the binding, I used 4in wide grosgrain ribbon. First I folded the overhanging bottom layer upwards on top of the original layer, hiding its edge. Then I put the ribbon on top to hide the edge of the bottom layer. I tried rather messily for a mitered corner, but stitched down the point where the ribbons meet. I was more concerned with durability here, than with esthetics.
The result is looking neat enough from top and bottom, save for the corners where I mis-cut the
bottom layer and had to stitch it back on afterwards (that small black
line at the corner...). Oops. I have yet to do a project where I don't
mess up at some point or other. It's part of my (often hurried) process.
Though I might take a cue from the fact that I literally was cutting
corners, there :-)
Some more detailed pictures. ...
The rug's been a big hit among the kids and visitors. I get a lot of satisfaction out of having made a rug for the kid that has yet to receive a baby quilt from me. Here you see it in the context of the rest of the room, and the bed that the husband made for her.


Very beautiful! First I thought it's just a little Mug Rug, but it's a real big Rug! Best wishes Jennifer
ReplyDeleteLovely! And with the wall decoration the room looks like a cosy tree house!
ReplyDeleteWOW - this is awesome!! So pretty on the floor!!
ReplyDeleteWow!
ReplyDeleteAbsolutely awesome - so nice ;-)
Greetings
Nicole
That is impressive and inspiring! You made a rug where there was no rug before! We shared this with our FB readers at homesteadlady.com.
ReplyDelete